
DIY Stenciled Arrow Pillow (Paint-a-Pillow Review & Giveaway!)
Hi everyone!! I've got a really fun project (and giveaway!) for you today!

Cutting Edge stencils make fabulous, easy to use wall and craft stencils. I used one to re-create the look of Faux Bois wallpaper in my bathroom last year, and I couldn't be happier with how it turned out! So when they contacted me to try out their newest product, Paint-A-Pillow, I was curious to say the least!
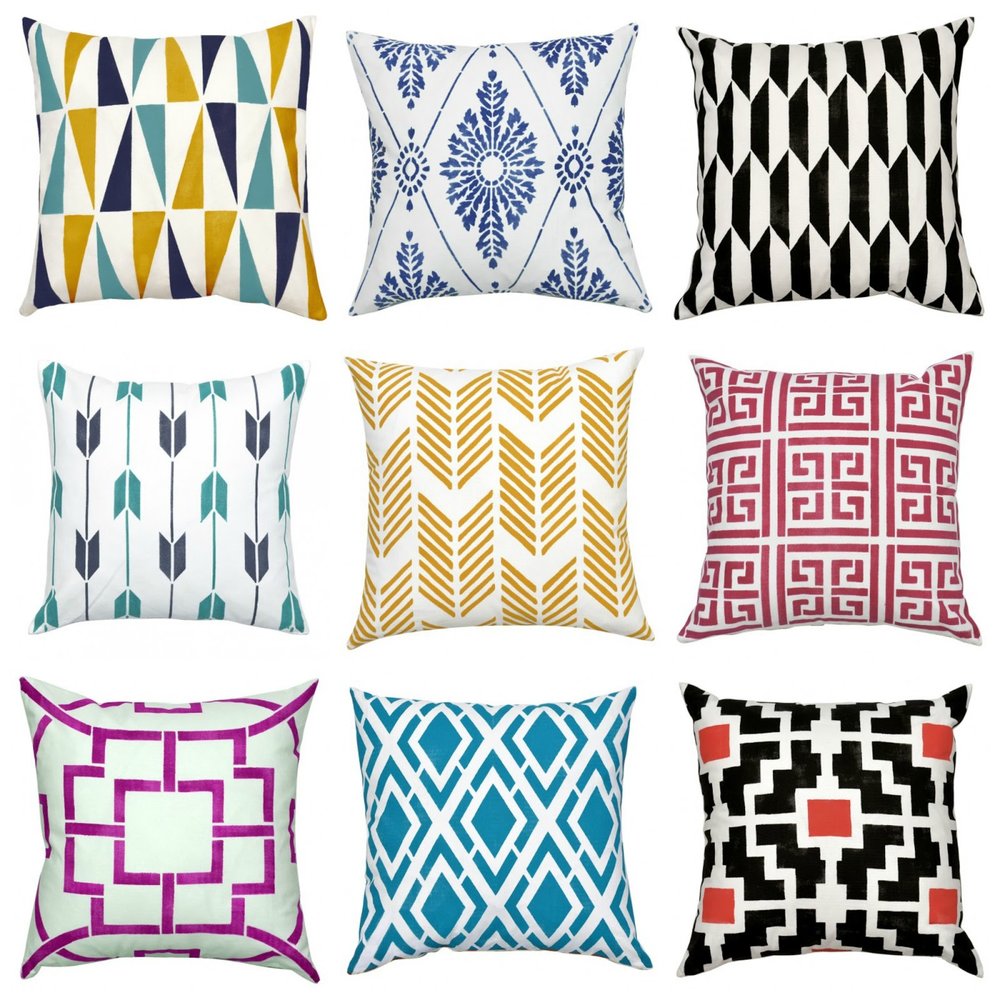
After check ing out their site, I was pleasantly surprised at how many unique pillow stencils they offer. Check out a few of my favorites.
The cool thing about painting your own pillow is that the color possibilities are endless! PLUS they offer accessories such as tassels and studs to make your creation even more one of a kind. I ended up picking out the Tribal Arrows Pillow kit and black suede tassels.
The kit arrived in a neat box that doubles for a storage container for your stencil and paints.

The Paint-A-Pillow kit comes with EVRYTHING that you need to easily paint your pillow.
Kit Includes:
- Stenciling frame (pat.pend.)
- Reusable pillow stencil
- 17”x17” Cotton pillow cover
- Pillow insert: linen/down alternative
- Mini roller and 1/2" stencil brush
- Paint tray and stirring stick
- Illustrated instructions
- Free mini stencil and practice fabric swatch
- One free fabric paint (choose your color above)

You can also mix the fabric paint colors together to create your own shade. I wanted to use 3 shades of gray, so I chose the Neutral Gray paint with my kit, then darkened and lightened it by mixing in a little black and white until I reached my desired shade.

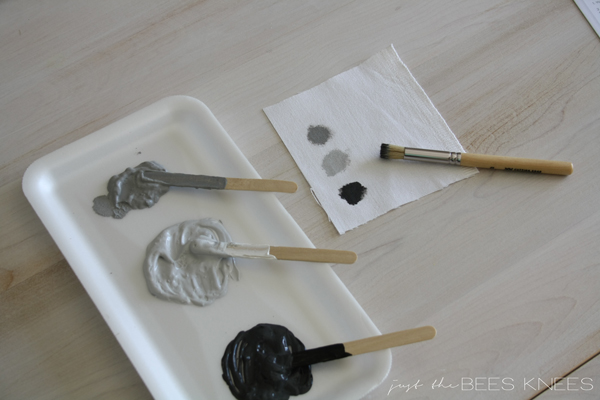
I also like that they supply a test swatch so you can practice first! I used it to test out my colors before painting the pillow.

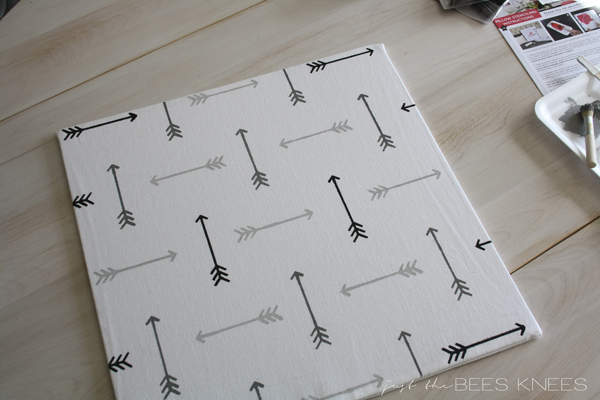
The painting was so much easier than I thought! I chose to use the stencil brush instead of the roller since I was painting each arrow a different color. I was worried that the paint would bleed through, but it didn't at all. The stencil holder held the pillow cover in place perfectly so there was no shifting or movement when painting.
After letting the front dry completely, which really didn't take long at all, I also painted the back of the pillow. ( I admit...I did use a hairdryer to speed up the process since I am ridiculously impatient!)
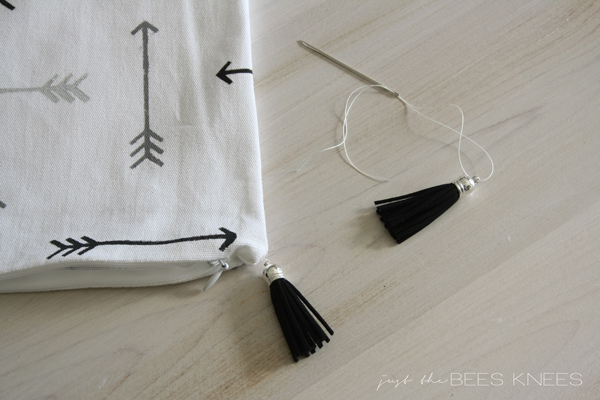
The tassels were a breeze to attach as well. I simply used some heavy duty thread to attach them to the corners, but If you don't sew, don't worry! They actually sell this handy dandy tool for easily attaching tassels that requires no sewing. And I kinda wish I bought it.
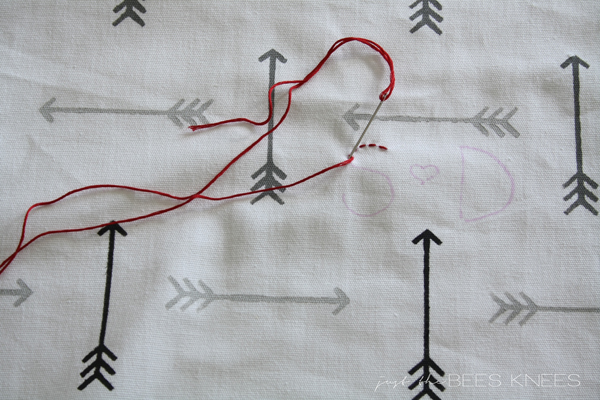
Since it is so close to Valentines Day, I had a great idea to stitch in the initials of me and my sweetheart. I simply drew them on using a disappearing fabric pen, then hand stitched using embroidery thread. Aaawwww!
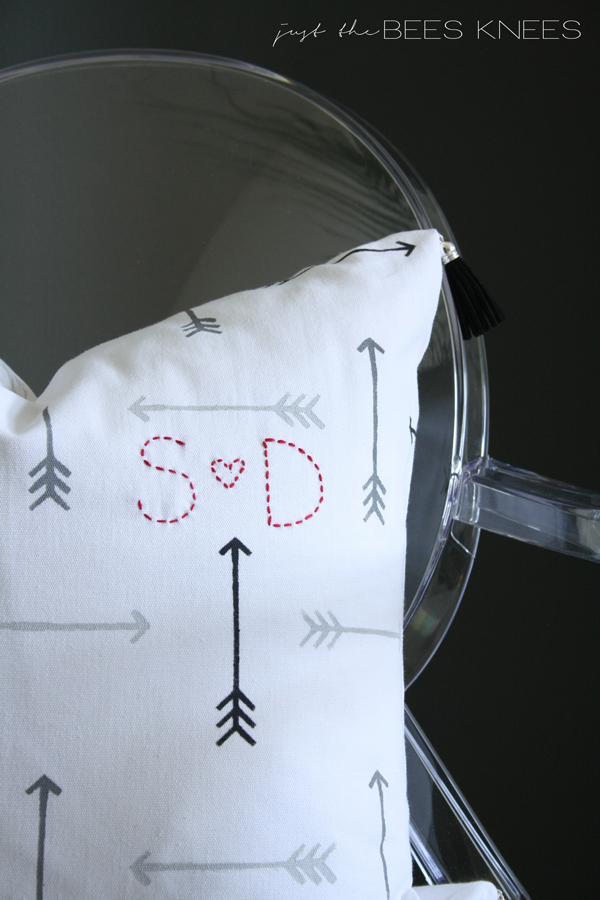
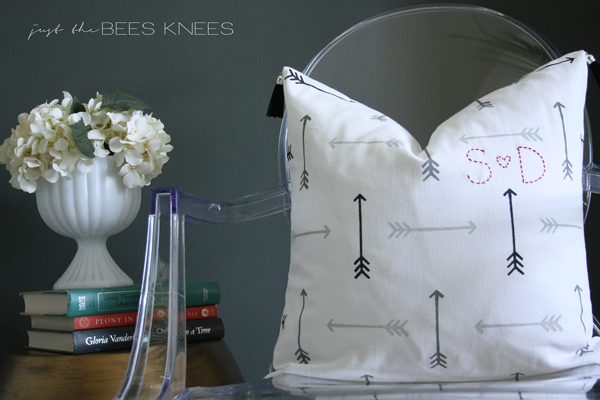

I love how it turned out! And I was also pleasantly surprised at how soft and flexible the fabric is after it dries. You can even heat set it to make the fabric washable.
So what do you think?! Want to give a Paint-A-Pillow kit a try?! Well the wonderful folks are going away a Paint-A-Pillow kit worth $45! Just fill in the Rafflecoptor form below to enter, then check back on Friday night to see if you won!
Best of luck!!

This is a sponsored post. All opinions are 100% mine!


