Everyday Design Dilemma Part 3: Gallery Walls ~ The Reveal
Hey y'all! I'm back! Miss me?!? You've probably been wondering what the heck happened to me and why I've dropped off the face of the earth this summer. Truth is, it's just been busy!! And instead of swamping myself with extra work, I just decided to take a break and enjoy this summer. In a few weeks my youngest starts kindergarten (gah!) so this will be my last chance to hit the zoo a few times and do some other activities we won't be able to once the kids are in school everyday. Sniff! Sniff! We travelled to Canada a few times and are getting ready to head to California for a week! One last big bang to say good bye to summer! We are taking the kids to Legoland, Disneyland and a few other places around the greater Los Angeles area. I cannot wait!! It will be a blast. The kids are beyond excited. Anyways....back to Gallery Walls!
Awhile back, I posted a series all about How to create your own Gallery Wall. Part 1 talked about planning your gallery wall, part 2 talked about tips on installing your gallery wall, and now I'm FINALLY ready to reveal mine!!
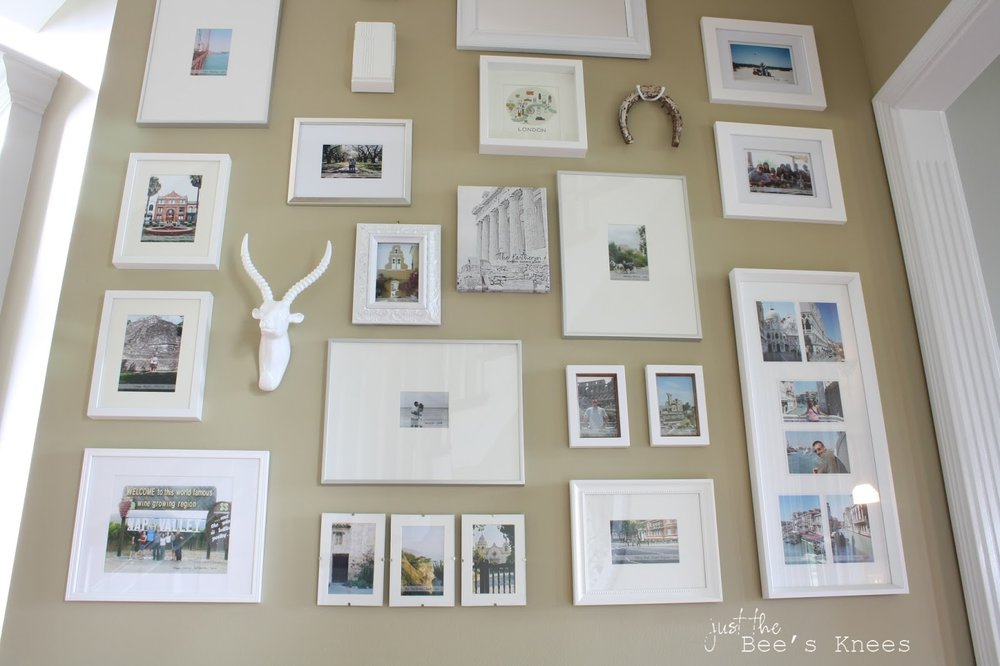
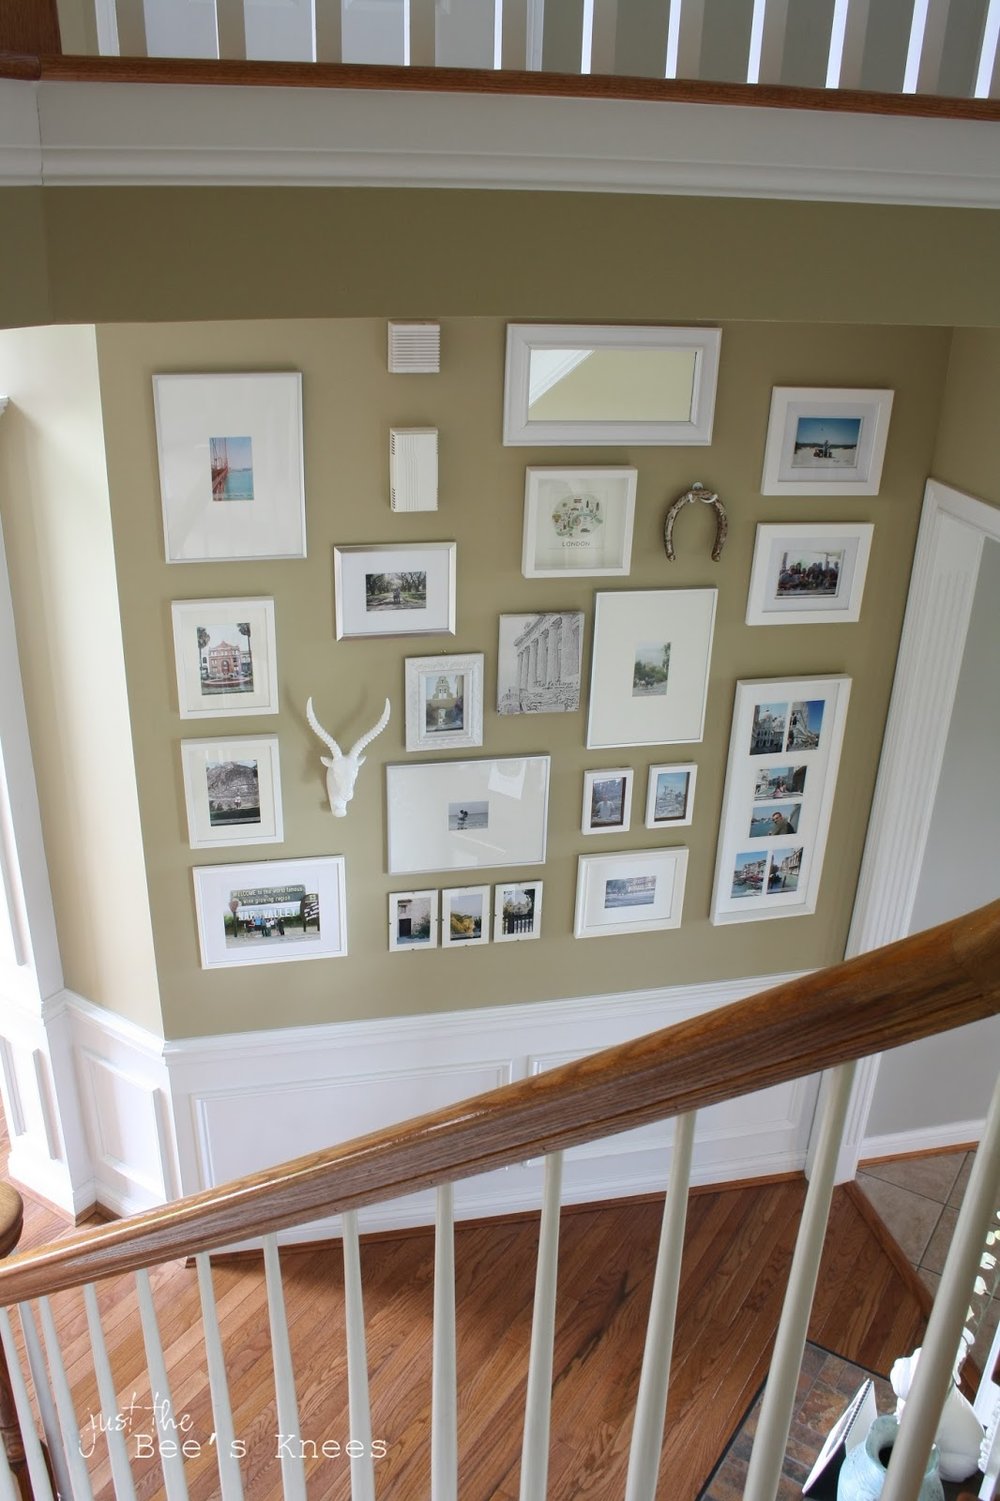
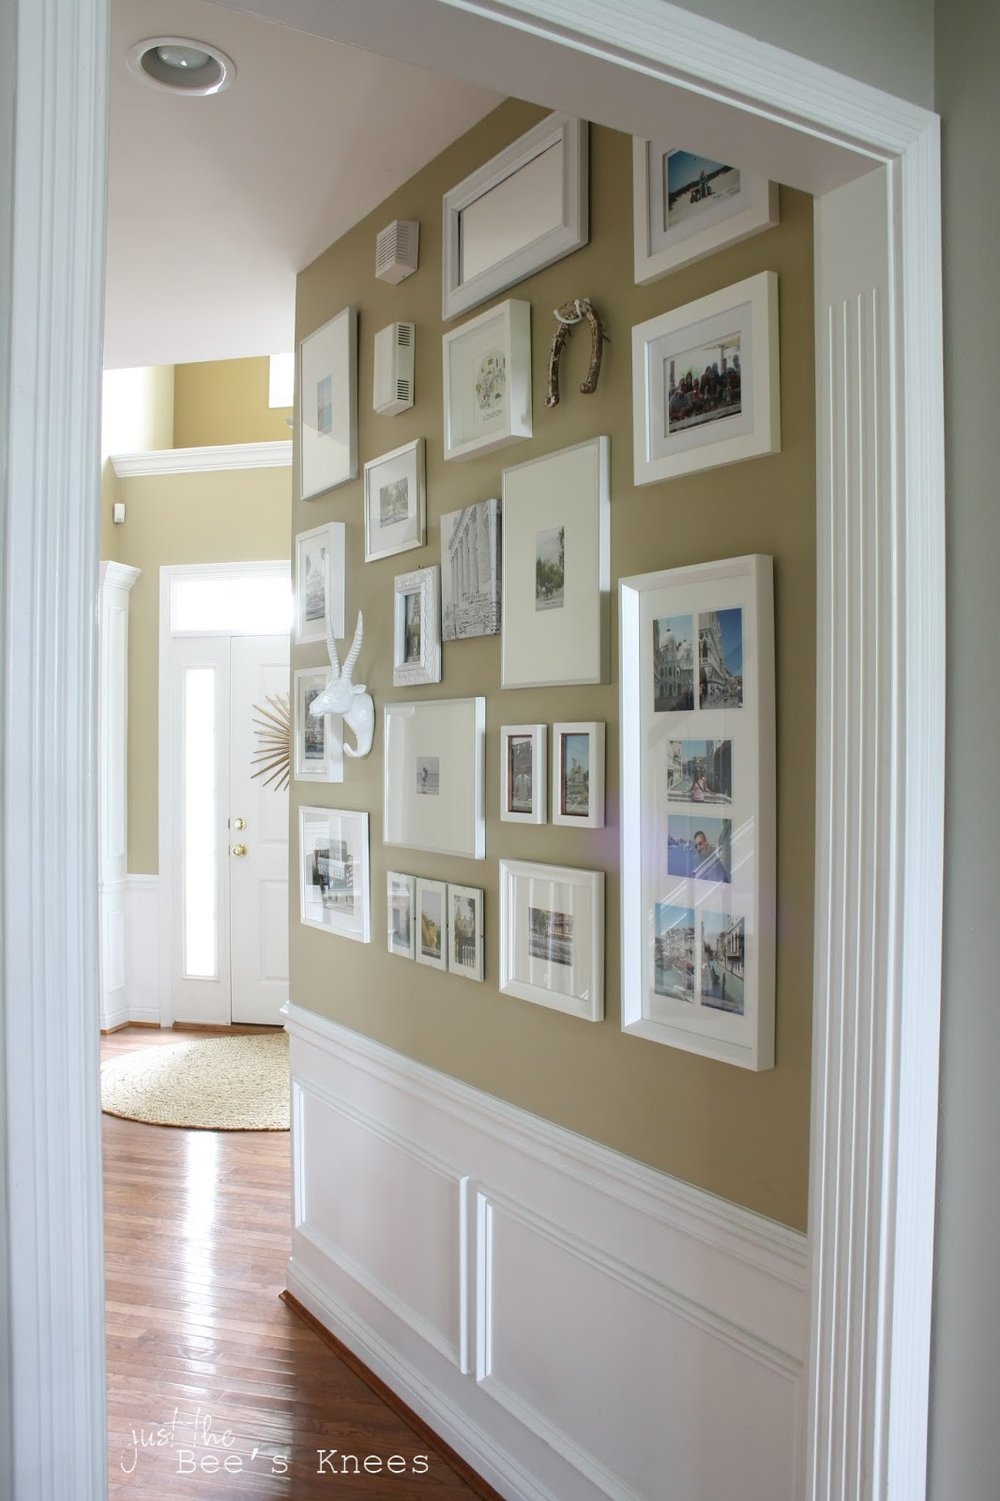
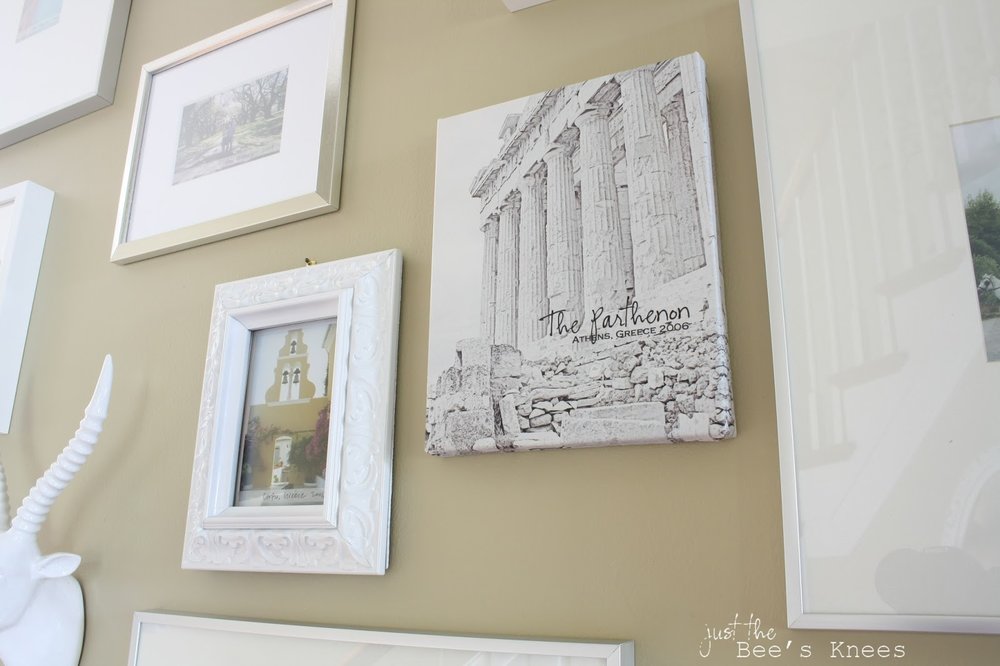
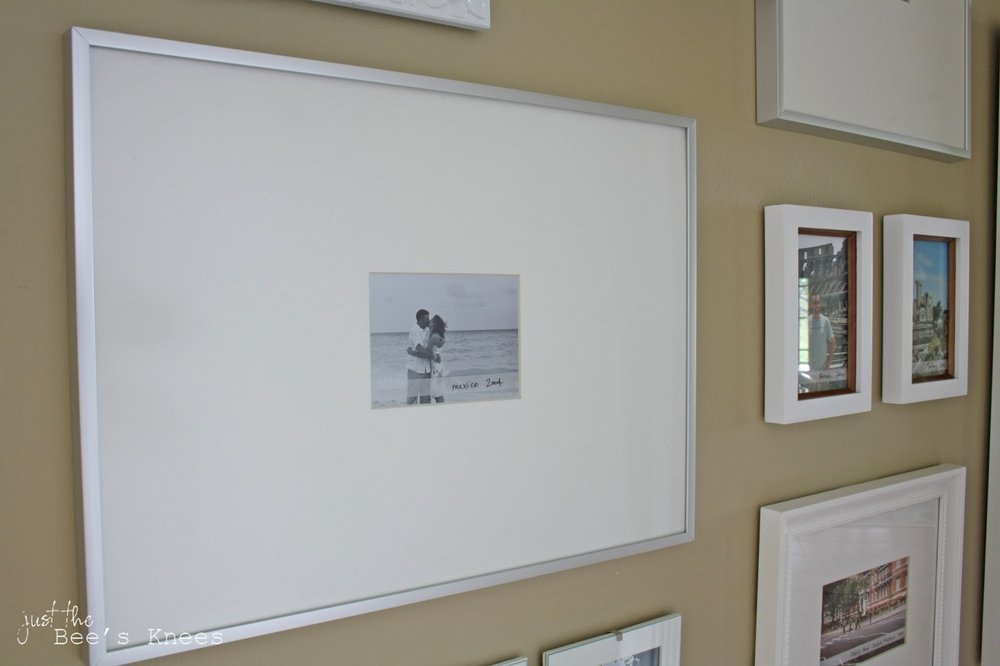
I used a wall in the front hall that leads to the kitchen and created a gallery Wall filled with images of all our past travels. I also left a little wiggle room to fill with more images of our future travels by filling a space with a mirror, as well as adding more than 1 photo from the same vacation. You better believe a picture of our family trip to Disney will be up there soon!!
I didn't want to spend a fortune on this gallery wall, so I used a variety of frames from Ikea, Target and Michael's, as well as a few thrifted ones sprayed white. I also wanted a cohesive look, so I used all white and silver frames. Quick Tip: 3M Command strips are your best friend for hanging less expensive and small frames that may not have the best hangers on the back! I used A TON of them. Also...does anybody spy the doorbell?! I didn't hide it, but made it look a lot less noticeable by blending it in around the frames.
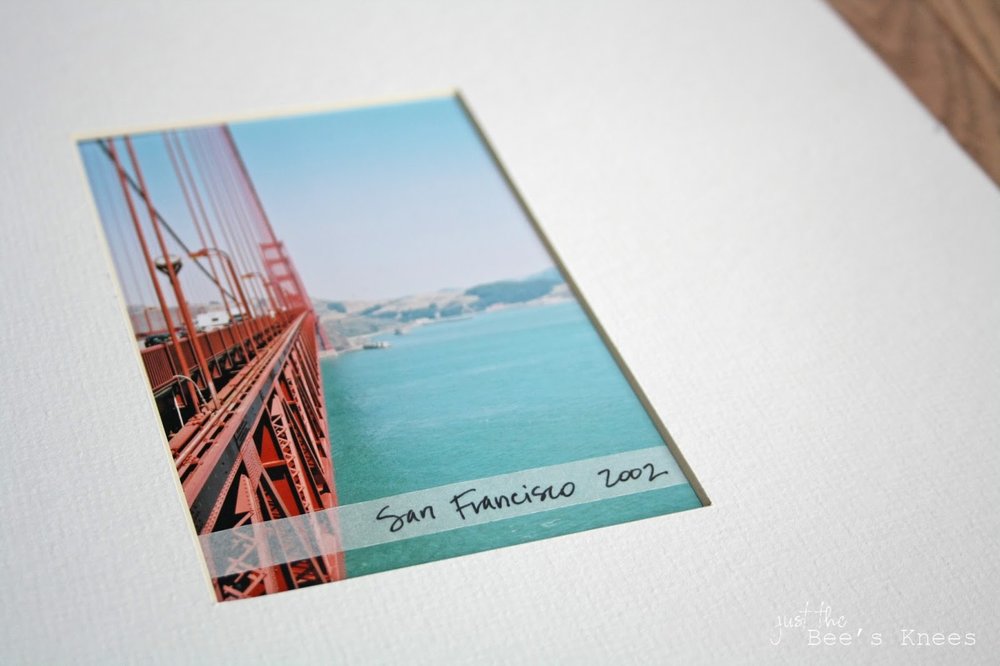
Originally I was going to write the name and date of the place we travelled to directly on the photo mat, but I decided to cut strips of vellum instead, then placed them between the mat and the photo. This way I won't have to cut a brand new photo mat if I ever want to switch out the pictures! And I love the transparency of the vellum. It's subtle enough that it doesn't take away from the subject matter.
One of my favorite things in this gallery wall is my framed London print form the Rifle Paper Company. I just adore their prints!! Mine was actually from a desk calendar I purchased awhile back, but you can also order the print by itself.
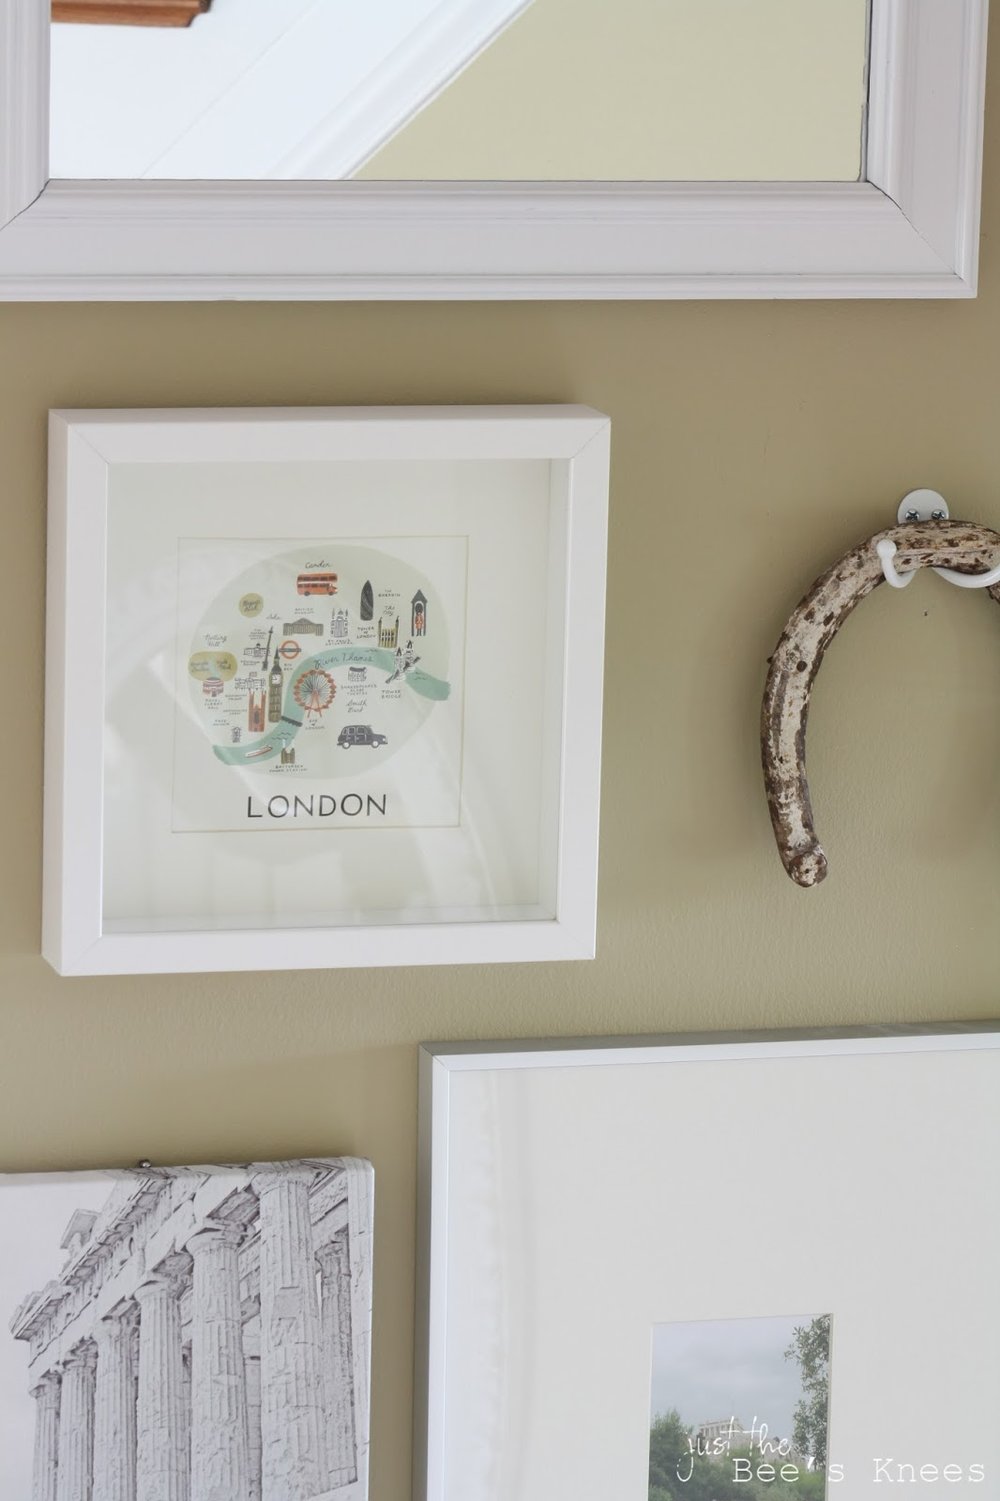
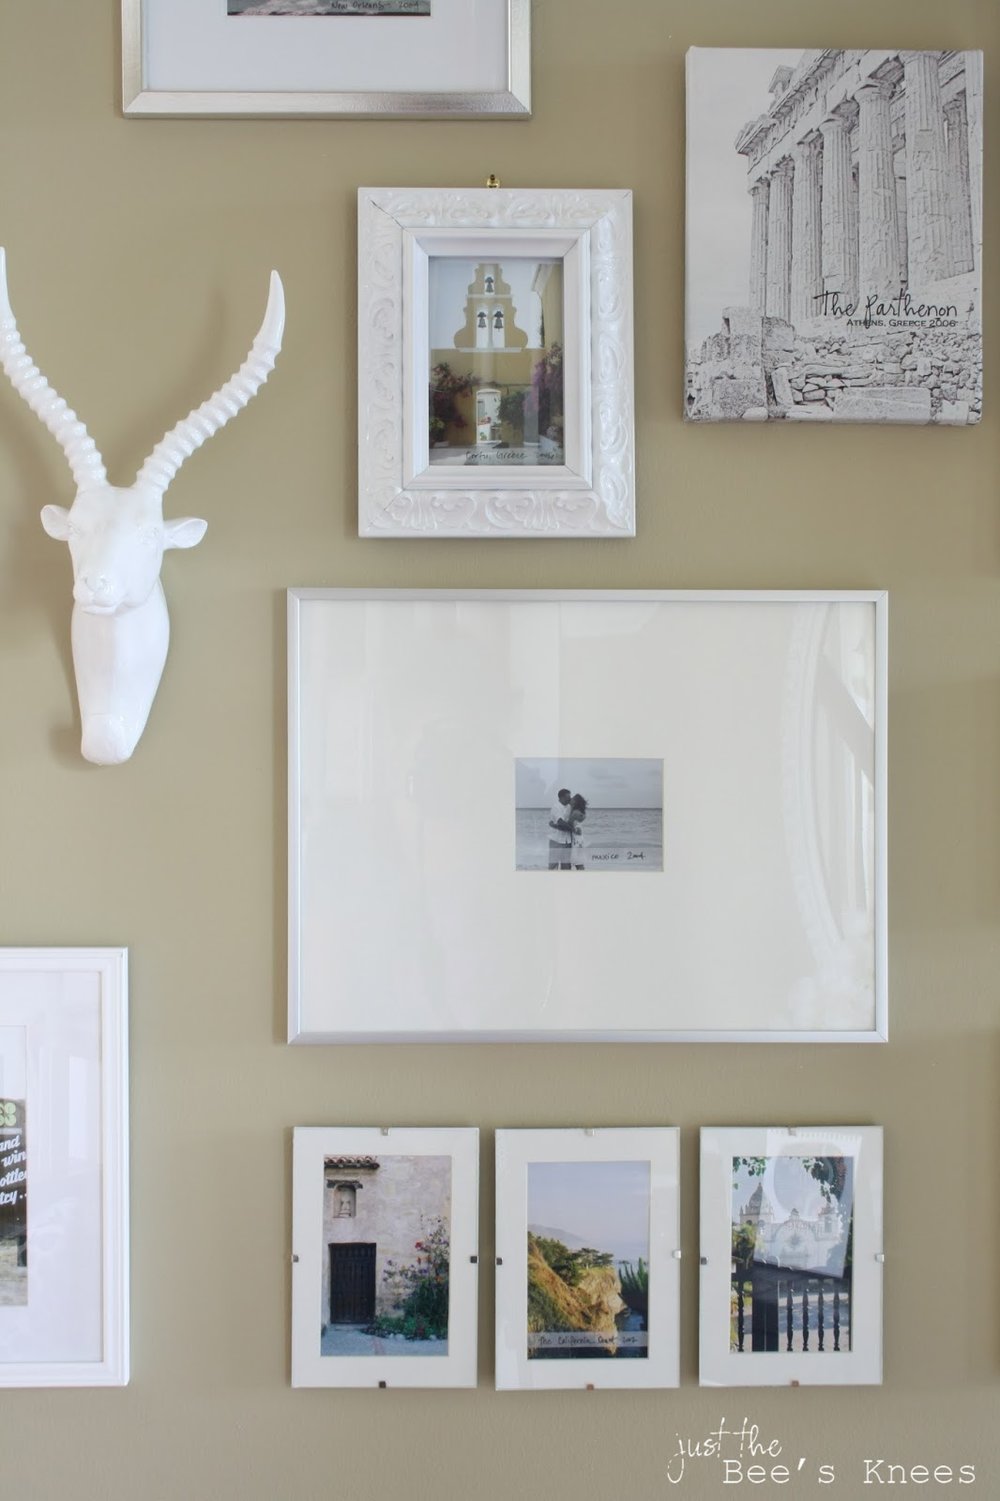
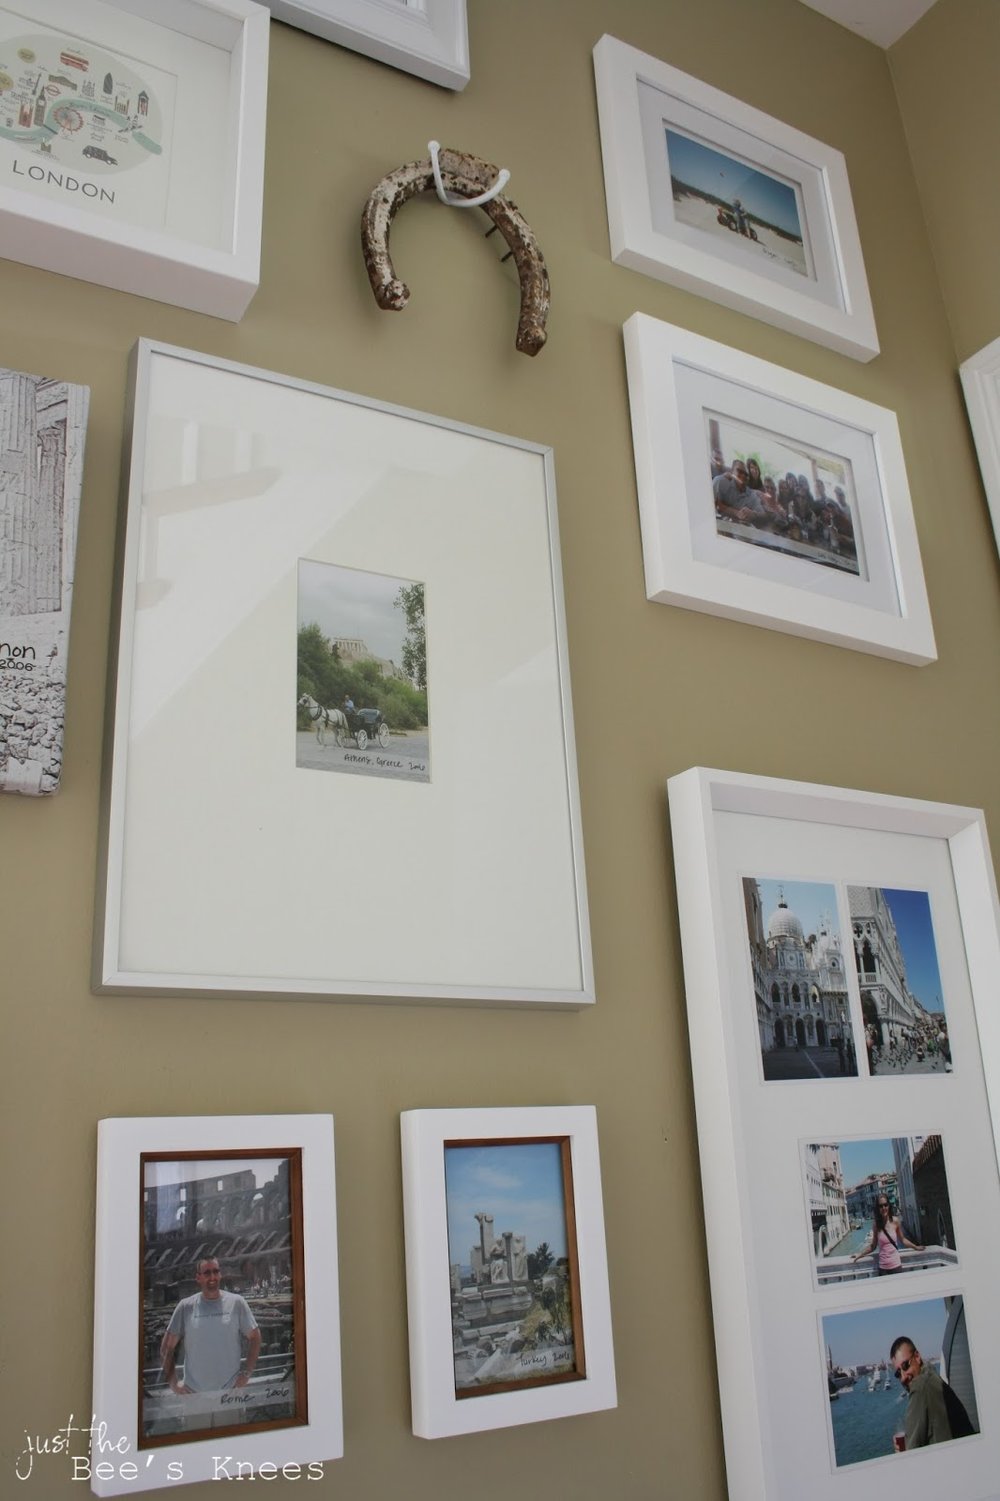
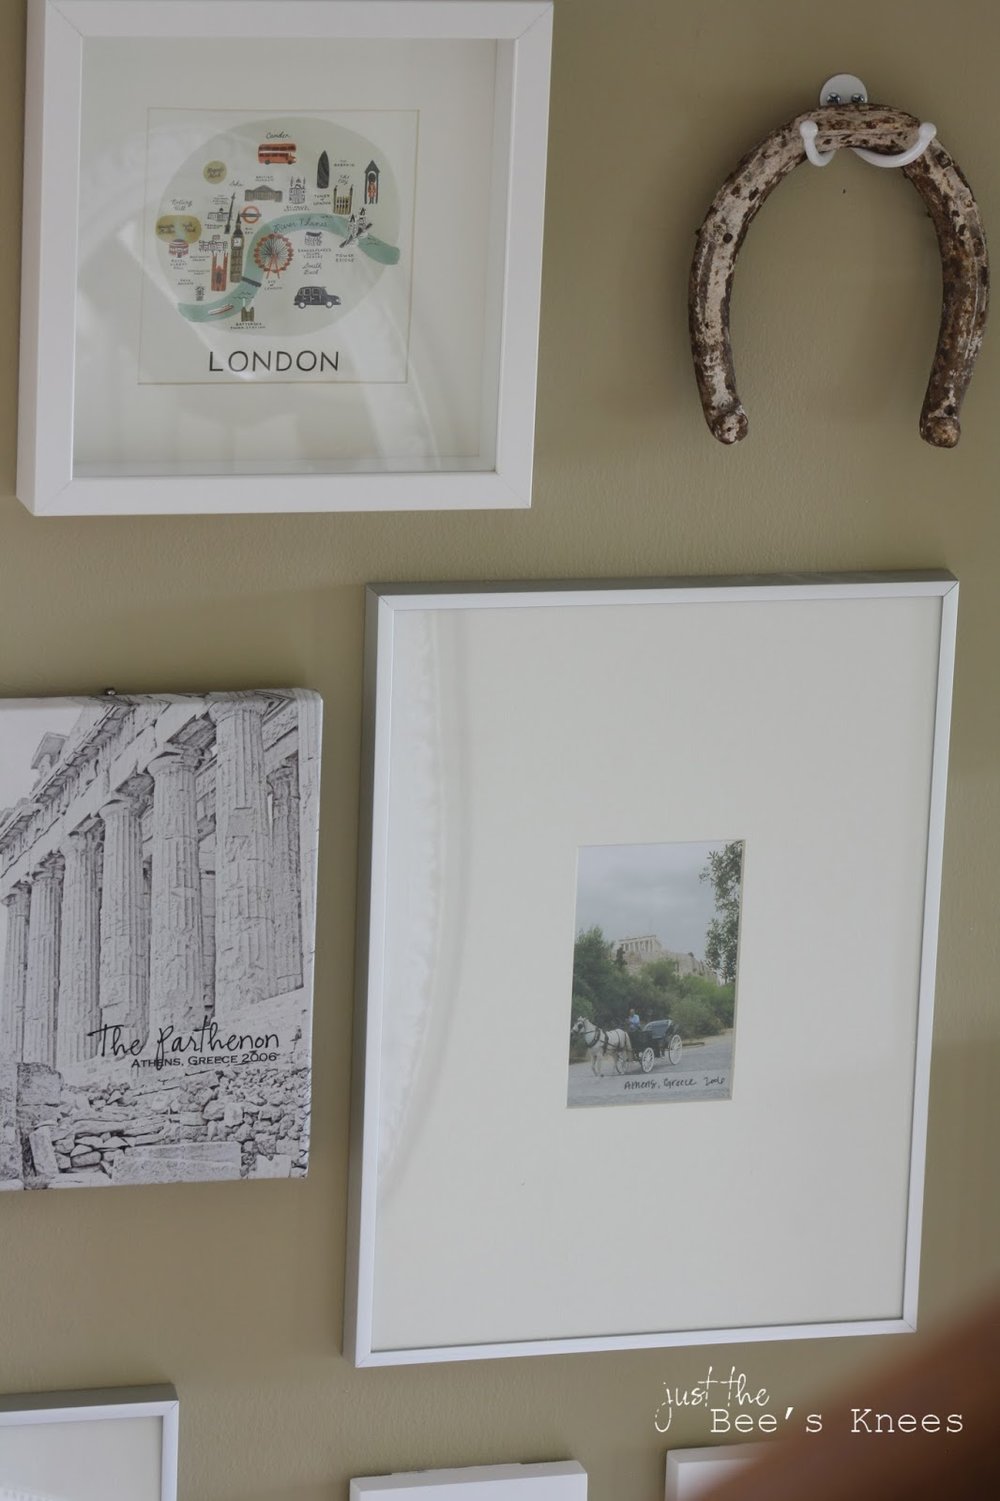
To add a little interest, I hung a fun antelope bust that I found at Home Goods, as well as an antique horseshoe I discovered at our local flea market. I know some of you might think its bad luck to hang a horseshoe upsidedown, but it still had the nails in it, so this hook was the only way I could figure out how to hang it! Good thing I'm not superstitious:) I also used a stretched canvas print I had custom made from Easy Canvas Prints. They always have great sales and their canvas as are high quality. (Here's a link for BOGO all Canvas Prints + Free Shipping, just for my readers! )
I still have some wall space above the hallway entrance and on the small wall under the stairs to continue my wall of travel pictures in the future, if I choose to do so.
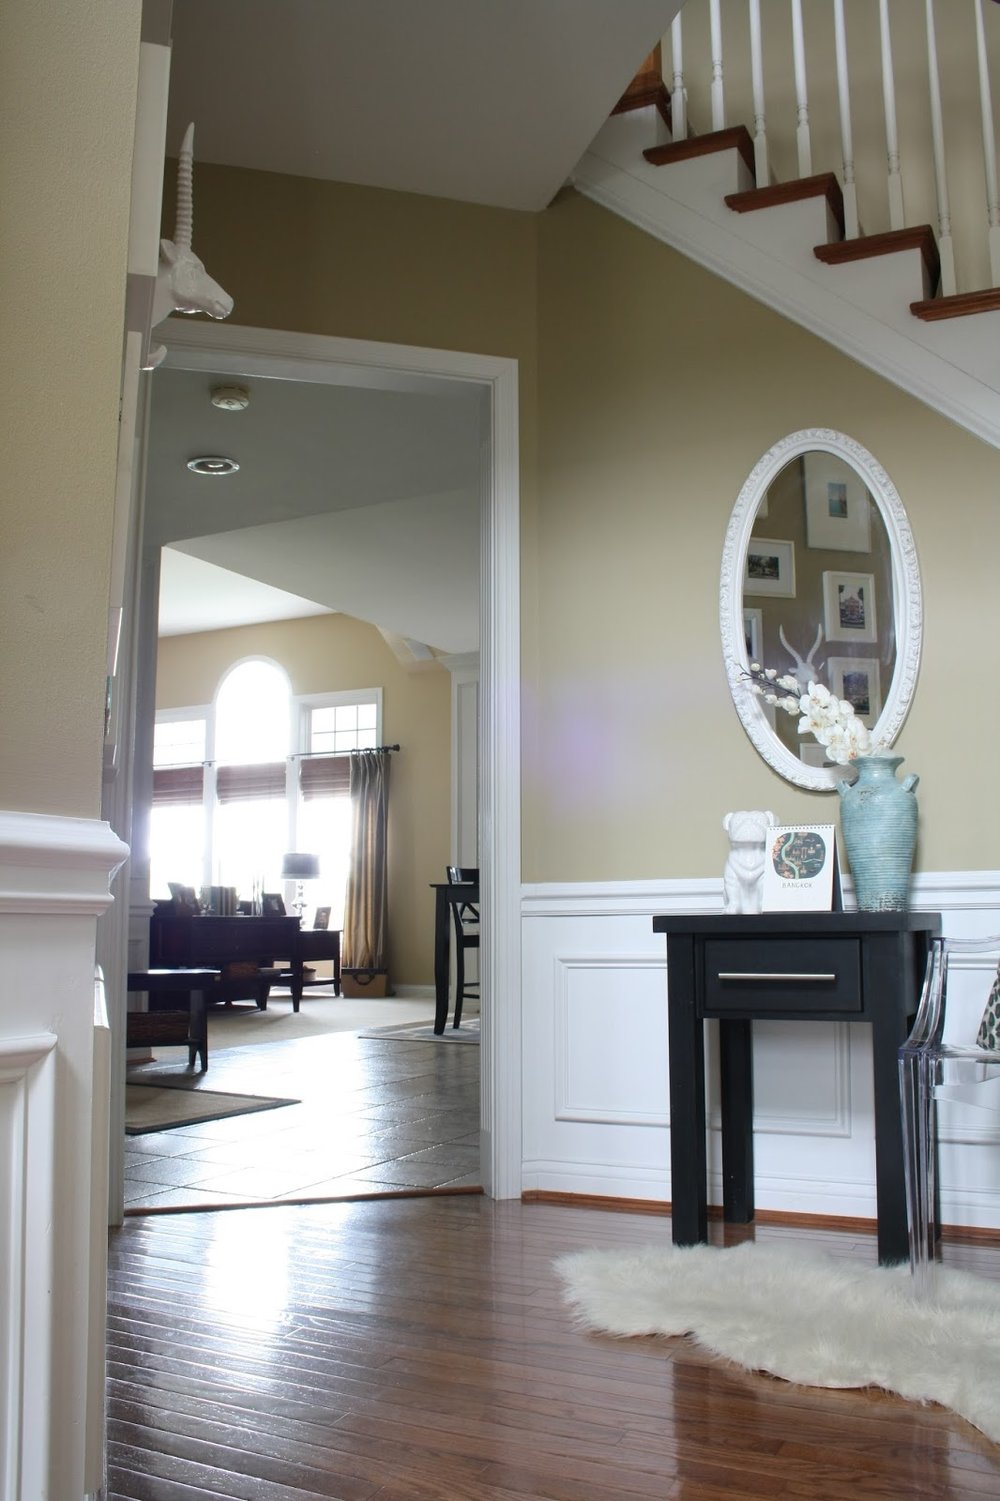
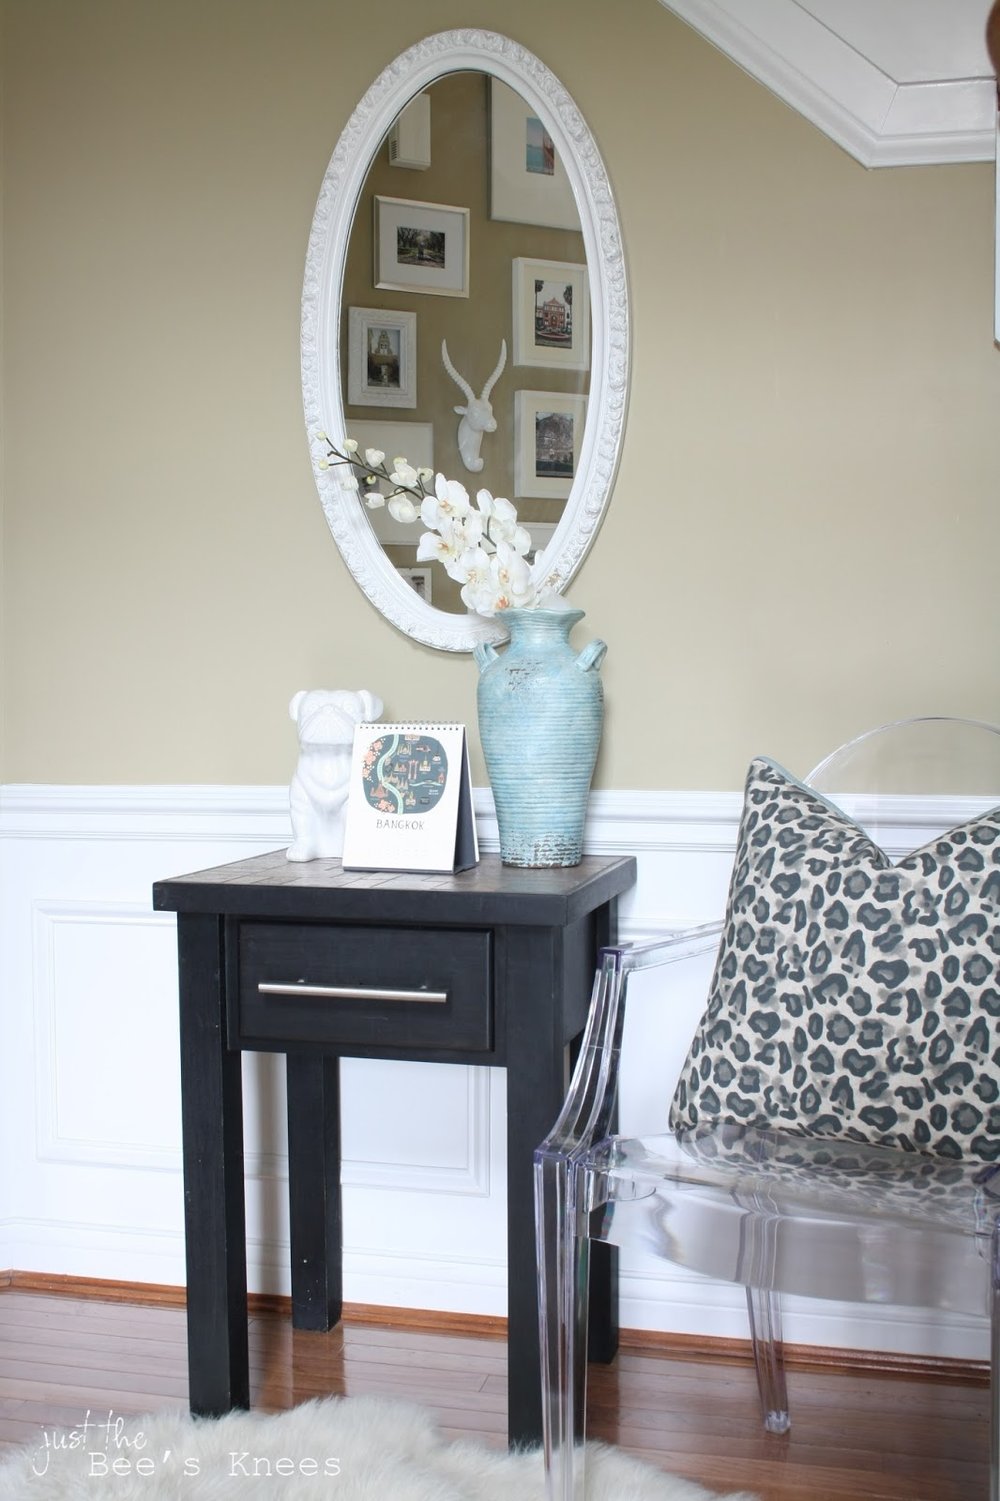
Here's a quick peak at the other wall in my entryway. I picked up the oval mirror from a local thrift store and I love how the gallery wall is reflected in it. The table was a DIY project from YEARS ago. The black paint and tiled top is a little outdated now, so I think I might repaint it and update the top with a marble mosaic of some kind. I'm in love with my lucite ghost chair, but it's a little big for the space, so It's new home will probably be my craft room, and I will have to find something else to put there. I might even just replace everything with a nice bench. What do you think?!
It feels good to be back blogging again after my hiatus!! Starting mid August when the kiddos are in school, I will have TONS of time to occupy myself with more projects and blog posts! Until then, follow along with my California adventure on Instagram and be sure to check out the other parts to my Gallery Wall series!

New here? Don't miss a thing! Get posts delivered directly to your inbox! Click here to subscribe!
Sharing With: